Monday, 21 July 2014

A pop of colour!


Sometimes it feels so good to spoil oneself with a pop of colour for the home when outdoors is dull and dry .. I did last week!  I was having lunch with a dear friend of very long standing .. 51 years in fact ... at a lovely restaurant called the Silver Birch situated inside a nursery. I spotted a display of gorgeous Calla Lilies, or to be botanically correct Zantedeschia, as we walked in through the fabulous shopping area housing indoor plants and de-vine goodies for the garden and home.   I decided as we were leaving to spoil myself and this is the beauty I came home with! Delicious pink blooms to brighten up a little corner in my lounge!


Such loveliness♥

~ Flowers don't worry about how they are going to bloom.
They  just open up and turn toward the light, 
and that makes them beautiful ~
Jim Carrey


My Blissful Mood Blanket is pleasing me hugely .. Maybelle Flower Squares in favourite colours.  49 squares done and joined with 35 squares to go.  I am starting to think about borders ... at the moment I am leaning towards either a white lacy border, or a many-rowed border in white but also featuring some of the colours!


and on the subject of blankets, the afghan I made as a wedding gift was delivered on Sunday, and the happy couple were over the moon with it ~ Happy heart ~


I have added a second group of blogs listing some of my favourite foodies we have in South Africa, really top notch and talented, I often go to their sites for inspiration.  Do take a peek, I find most recipes can be adapted no matter where you live! 

I am working on a lovely project at the moment, called Emily's Garden Blanket ... you can see pictures of the blanket in progress on The Patchwork Heart .. it is quite the most beautiful thing I have seen in ages, and I am making it for another very dear school friend.  Pics of my progress will be in my next blog post!  I am so enjoying this project♥

Chat soon,
xxxx Pat xxx


Thursday, 3 July 2014

Layla-Lu beanie

Layla-Lu Beanie


As promised, here is the pattern for the last beanie I made for my Mandela 67 project.

Pattern info:
  • US Terms :: A conversion table is available here for UK terminology
  • Yarn ~ I used a thicker rather than thinner DK yarn
  • Hook ~ 4mm
  • Stitches used ~ dc :: double crochet; sc :: single crochet;  Sdc :: standing double crochet  
Sizing: This is a useful chart to use for choosing the appropriate size for your hat.


  • I have found using the approximate diameter in relation to the age has been successful.  I have made more than 100 hats and beanies using this formula, all with great success. And then again, making hats to fit 100% is almost impossible, it is an inexact science, since heads come in many different shapes and sizes.  So don't sweat the small stuff .. if you are a couple of mm's out (preferably under), you will still have a super result.
  • To get closest to the correct diameter, I have sometimes done my last increase row in single crochet (sc) instead of double crochet (dc).  Or used single crochets or half double crochets (hdc) in all rounds to make the crown.
  • This pattern is for the smallest hat I make;  if you want to make a bigger hat, in it's simplest form this is how the increases work, starting in Row 2:  2dc in each stitch;  Row 3: 2dc, 1dc, 2dc etc;  Row 4: 2dc, 1dc, 1dc, 2dc etc; Row 5: 2dc, 1dc, 1dc, 1dc, 2dc etc; Row 6: 2dc, 1dc, 1dc, 1dc, 1dc, 2dc etc;  so in each row you are adding an extra dc in between the 2dc's.  If you begin with 12dc in your circle, each row after that will be 12dc's more i.e. 12dc's, 24dc's, 36dc's, 48dc's ....
  • Be sure to measure the diameter across your work after adding each subsequent increase row .. you ideally need to have a measurement just under the measurement in the chart.
So lets begin .........

Start with a Magic ring or crochet 6 sc and join with a sl st to form a circle.

Row 1
Into circle ch2 or Sdc, 12dc, join with a sl st to complete row (12dc)


Row 2
Ch 3 or Sdc, 1dc into same st as join, 2dc into each dc from Row 1;  join with a sl st into top of 3ch or Sdc to complete row (24dc)


Row 3
Ch 3 or Sdc, 2 dc into next st, *1dc into next st, 2dc into next st*;  continue *~* to end of row, finishing with 2 dc into last dc; join with a sl st as before to complete row (36dc)


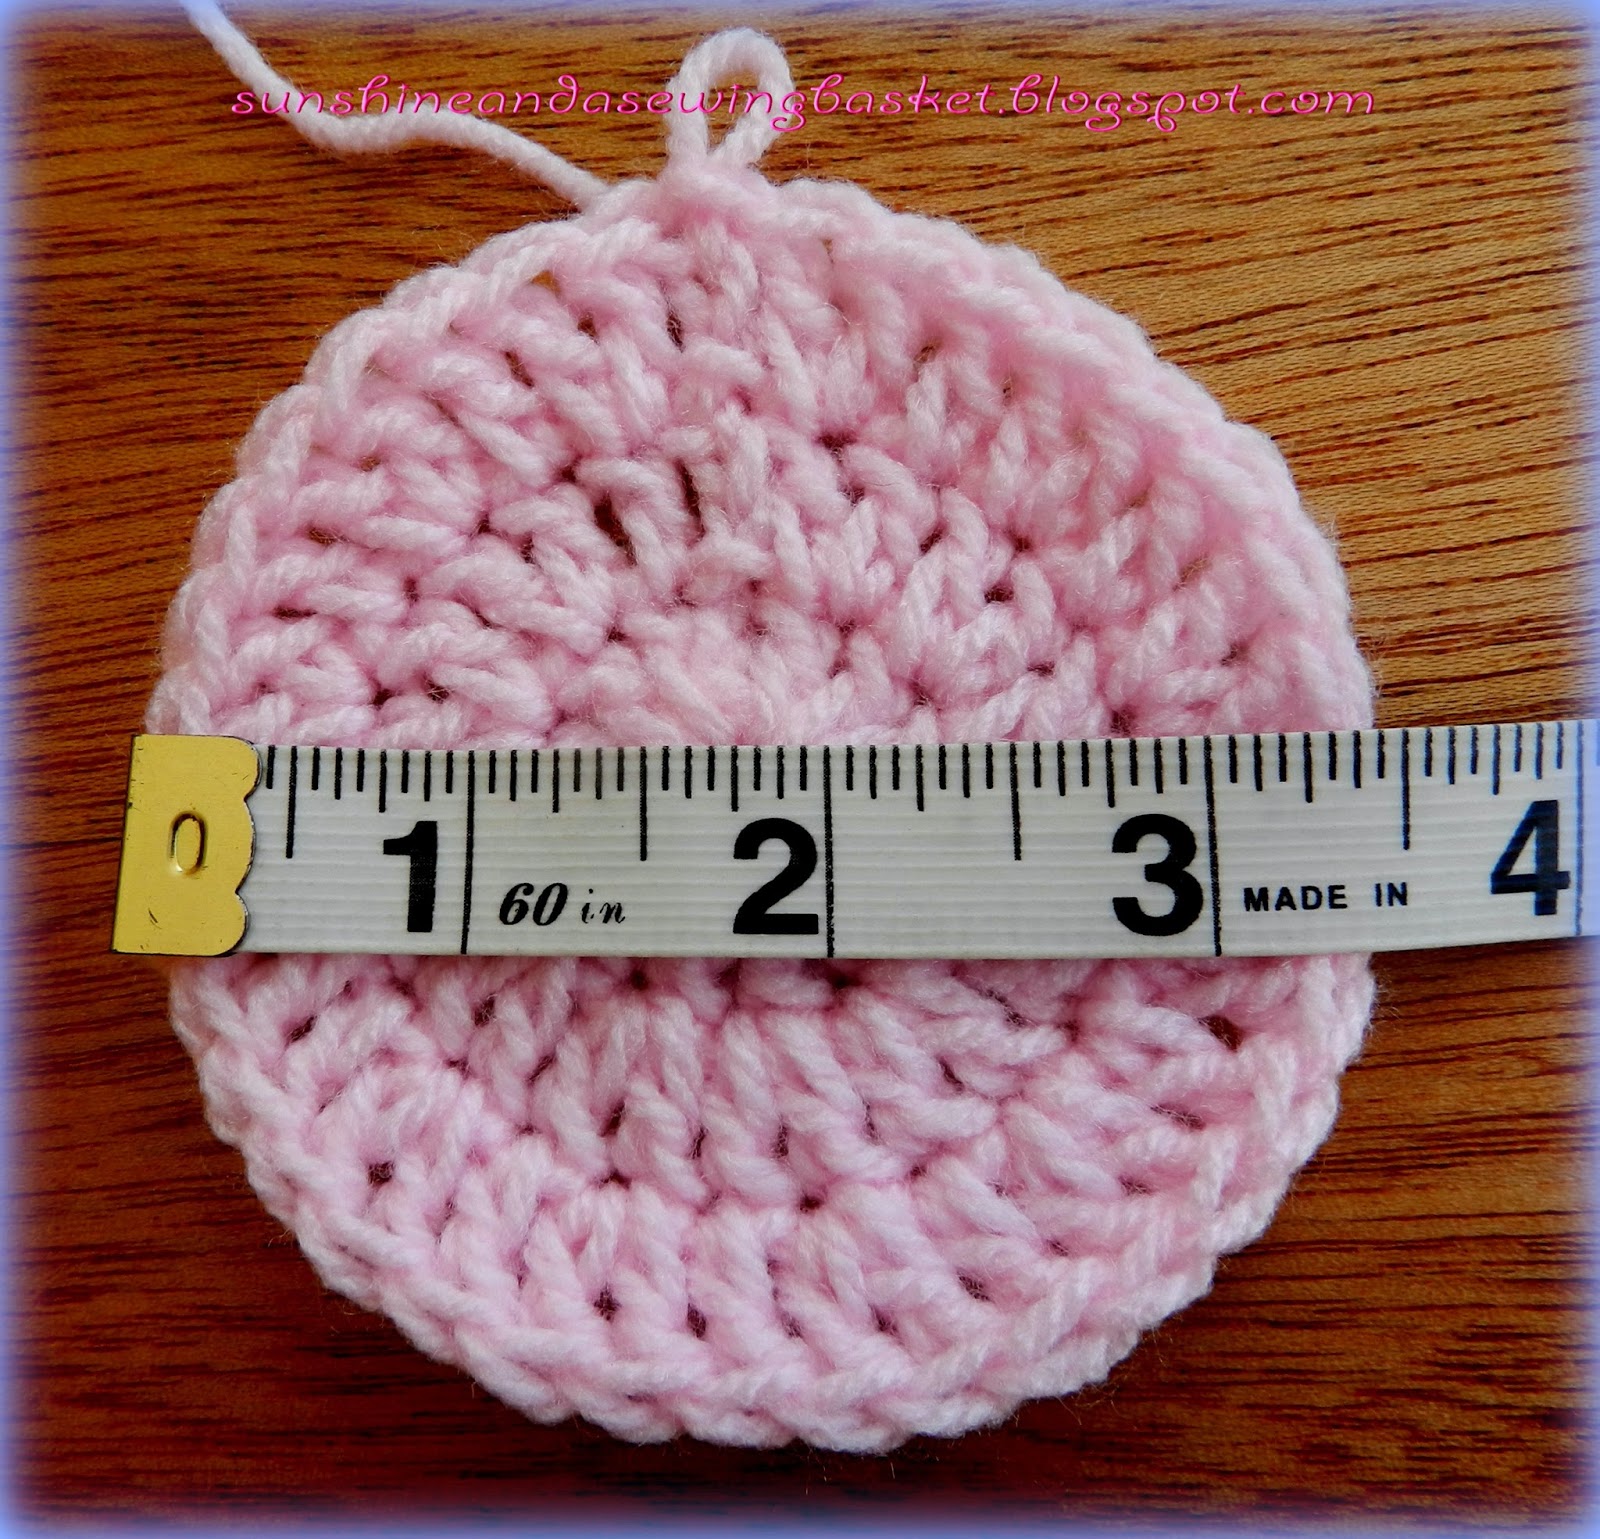
At this point, the diameter across your work should measure +- 3.5 inches or 9 cm.  This is the smallest hat I make, which fits a New Born babe.  You could take your measurement down to 3 inches or +- 7.5 cm if you wanted to make a really teeny hat. See how to adjust the diameter in the notes above. 


Row 4
Ch 3 or Sdc, 1dc into same st, *skip 1 st, 2 dc into next stitch*; continue *~* to end of row, finishing with 2 dc into second last st;  join with a sl st as before to complete row (18 dc pairs)


Row 5
Sl st across to first space between dc pairs.  Ch 3 or Sdc; 1dc into same space, *2 dc into each space*; continue *~*to end of row; join with a sl st to complete row (18 dc pairs)

  
Continue repeating Row 5 until you have the desired length minus ½ inch/1cm.  


Now comes the border ... an easy border is: 1ch, 1sc in each st to end,sl st in starting 1ch to join.  Do 2-3 rows.


Another super way to border a little hat is to do a Reverse Single Crochet st or Crab st.  Do 1-2 rows of sc, then a row of Crab st.  The link has a very good video tutorial on how to do this versatile stitch.  This is how it looks, I love it!


 Embellishments are so lovely to add to a little hat, here are a few gorgeous flowers with beads and buttons added ..


We are done!


Have fun crocheting the little hat, till next time
xxx Pat xxx


Monday, 30 June 2014

I like to call them Contemporary Doilies!!

This weekend was just lovely ... mild and sunny on Saturday, a nice downpour of rain on Sunday, and in between just chilling with my dear David and my crochet work on our new little deck!  Just before the storm, I checked our lemon tree, in case gusts of wind did any damage ... wowwee ... I have beautiful lemons this season ... I see Lemon Curd and Lemon Meringue Pie happening in my kitchen in the little while!


My crochet endeavours took the form of two beautiful contemporary doilies, as I like to refer to them ...  These are not really Mandalas, but also not Doilies in the old fashioned sense!  Although having said that, I have been trolling around Pinterest looking at the gorgeous Vintage patterns available .. I could get quite taken with making one or two! 

This is the first one; it is an adaption of a Vintage Flower Potholder.  The yarn is 100% Cotton in yellow and a variegated blend of colours.


Bright and colourful

The second is a Vintage doily pattern from Lacy Crochet, one of my favourite blogs for all things delicate and lovely!


I love this pattern, and I love the green yarn too, it is a 100% Bamboo 4 ply. The yarn has a gorgeous sheen and slight marbelled effect.

I wish you a wonderful week dear friends, full of creativity, contentment, many cups of your favourite bev, and a slice or two of chocolate cake, if that takes your fancy!!


Till next time
xxx Pat xxx

Wednesday, 4 June 2014

Half way there! My Madiba 67!!


In my very first blog dated Sunday 1 September 2013, I mentioned a special project I was working on, 67 hats for Mandela Day.  The general idea is to spend 67 minutes in some sort of service or activity to honour our Madiba. So I decided to make 67 little hats for needy and disadvantaged prem and new born babies as my contribution.

Since then I have got so caught up with other projects ... I counted the hats the other day, and PANIC STATIONS ... I am only half way there!   So my main focus right now is to finish all the hats so that by 18 July I have got 67 of the cutest Prem and New Born baby beanies to take to a needy natal and neo natal unit in my area.

These are some of my latest additions; I made three last night while watching tellie, so quick and easy and a chance to use up small balls of yarn!


Here are two teeny hats I have just finished ... I used two patterns from Olga from Lacy Crochet .. they are just the cutest little hats ever!  Thanks Olga ♥ 


Shells Newborn hat in a soft variagated yarn and a swirl pattern in peppermint green

So happy you stopped by ... till next time xxxxxxxxxxxxx
Pat


Wednesday, 21 May 2014

Aztec Dazzle Mandala for Yarndale 2014

Have you ever crocheted along happily, loving how everything is coming together nicely ..... sewing in the last thread .... standing back and looking and saying 'wow, that really looks fab, well pleased with that'  and then realising that instead of 16 dc in the Magic circle, there are only 14 - noooooo - Who makes a circle with 14 as a starting number .. really!!

It's just happened to me ... I couldn't believe my eyes!  So anyway, the mis-counted item in question was my test pattern for my Yarndale Mandala.  I love how it looks despite being an oddie;  the yarn I used is a 4ply, in autumn colours that I am rather enjoying ... strange with me being a Lucy/Cath Kidston colour palette fan!

Aztec Sun Mandala

Aztec Sun Mandala in 4ply - measures 7.25" (18.5 cm) across
As an extra pop of the darker colour, I used a surface chain circle after row 4; also used a big darner threaded with double yarn to stitch into the circle at the centre and out through the dc's in row 2 to create a spiked effect. No pattern for this one, just experimenting with stitches!  

My Yarndale Mandala is finished and on it's way to Skipton UK ... and needless to say, it is not an oddie!   I have mainly followed my test pattern, but bearing in mind that the Mandala for the Yarndale display must not be bigger than 8 inches, and that I used much thicker yarn Elle Gold DK, size 4mm hook, it is quite lovely but quite different. Diameter across is 7.5cm.  This is the first colour-way I made up. This will hang in my Craft Studio, as a memento of Yarndale 2014 ... lovely.  I used a different colour combo for my Yarndale Mandala, the pattern for which is up on my blog today!


Aztec Dazzle Mandala 


May 11 was my birthday and well as Mother's Day (in South Africa);  we had a lovely lunch at my daughters home, with friends and family ... just missed my eldest son so much ... he lives in Woking UK!  A beautiful bunch of gorgeous pink roses and gymsophila stands on my dining room table, so lovely. Special time, very precious.


Until next time
xxx Pat


Friday, 9 May 2014

Yarndale 2014


This wonderful event is taking place again this year in September. I was beyond happy when asked to test these three beautiful patterns ......... 


...It was kept under wraps while the designing and testing was being done.  Then ALL was revealed !!!  They are designs chosen by Lucy of Attic 24, the creations of my dear bloggie friend and highly talented crochet artist Zelna of Zooty Owl Crafty Blog. 
Are they not gorgeous??   
Such excitement ... and I was so pleased to be a teensy weensy, very small part of the process, thank you Zelna!  All the patterns are available on her lovely blog, inspiring you to get your hook and yarn out and make a Mandala to send to Yarndale as a contribution to the display that Lucy is planning for the event this year .... sure to be AWESOME!


Read all about it ...the Yarndale blog and Attic 24 have all the info and Zelna's Yarndale post has the patterns .... do have a look!

Have a happy and creative weekend dear bloggie friends
Cheers for now
~ Pat ~

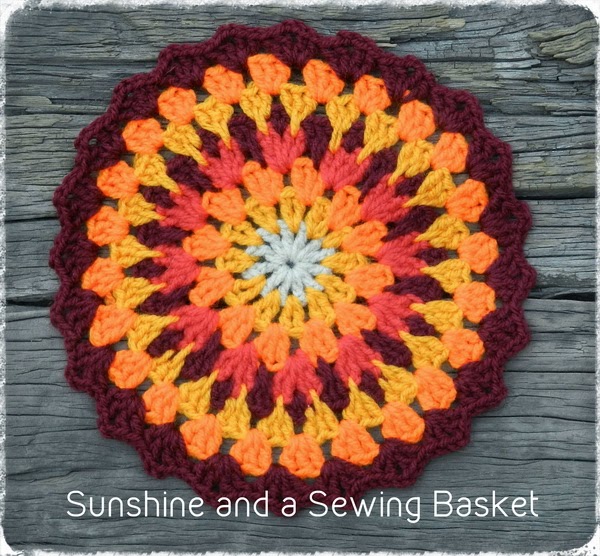
Sunshine Mandala


  ~Sunshine Mandala~

I wanted a slightly bigger Mandala so I decided to enlarge my first pattern, by adding a few more rows, and this was the happy result!  Here is the link to the pattern
which has rows 1 - 11, Row 12 follows below!


Notes:  

  • Use either chain stitches or standing dc/hdc/sc to start any row in this pattern or Maybelle Flower Pattern or any patterns that I may post in future. Sites showing how to make standing sts can be found on my previous post here
  • Descriptions of the Double 2dc cluster are also in my previous post for the Maybelle Flower Mandala.


Here are the additional rows:

Row 12:   Attach yarn in any sc stitch, with a chain 3 (or standing dc) into this stitch, make a Double 2dc cluster, ch 2,  sc into centre dc stitch of shell, ch 2, Double 2dc cluster into sc in between shells, chain 2. Proceed round circle in pattern and join to top of 3 ch (or top of standing dc) to finish the row. (16 Double 2dc clusters and 16 sc's)


Row 13:  Attach yarn in any 1ch space of a Double 2dc cluster and do 1sc, ch 4, 1 Fp sc around sc of previous row, ch 4, sc into 1ch space of cluster, ch 4.  Continue in pattern and join with a sl st into first sc to end row.


Row 14:  Attach yarn (or in the case of my example) sl st into any 4 ch space.  Ch 3 (or use standing dc), 3dc all into 4 ch space, 2 ch 4dc into next 4 ch space. Continue in pattern and close with a sl st into starting 3 ch (or top of standing dc)


Row 15: Attach yarn to top of first dc in any group of 4dc. Ch 3 (or standing dc), 1dc in next dc stitch, 2ch, 2 dc in each of next 2 dc sts, ch1.  Proceed in this way, you will see each group of 4 dcs from previous row will have 2 dc 'legs' 2ch and another 2dc 'legs' and each group separated by ch1. This is the foundation row for Row 16, which completes the Maybelle flower petals to mirror the petals in the centre flower.


Row 16:  Join yarn to any 1ch space (or keep the same colour yarn as I did) and make 1sc to start the row.  7 dc into 2 ch space, 1sc into 1ch space 7 dc into 2 ch space. Continue in pattern and finish with sl st into starting sc.


Row 17: Join yarn into any dc stitch, and sl st a border into each dc stitch around the petals, sl st into first sl st to end row.


ET VOILA!! 


I will be posting a photo 'how-to' shortly, just in case you find it easier, like I do .. to follow a pattern that way.

Exciting news has just been posted regarding Yarndale 2014 ... Lucy from Attic 24 has details on how to take part in this fab event;  also Zelna from Zooty Owl has exciting Yarndale news of her own .. be sure to take a peek at her Yarndale blog post!! 

I am excitedly setting about designing a new Mandala for my contribution; these wondrous wheels are sooo addictive, make one of the many patterns available, I bet you will have number two on your hook in no time!


Hugs 
Pat