Wednesday, 21 May 2014

Aztec Dazzle Mandala for Yarndale 2014

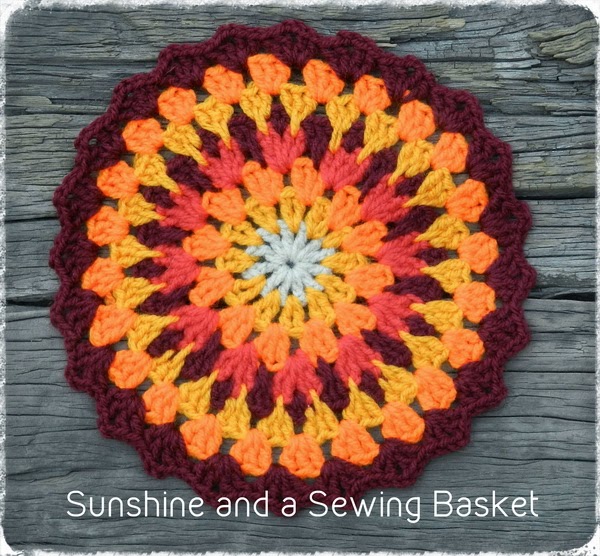
Have you ever crocheted along happily, loving how everything is coming together nicely ..... sewing in the last thread .... standing back and looking and saying 'wow, that really looks fab, well pleased with that'  and then realising that instead of 16 dc in the Magic circle, there are only 14 - noooooo - Who makes a circle with 14 as a starting number .. really!!

It's just happened to me ... I couldn't believe my eyes!  So anyway, the mis-counted item in question was my test pattern for my Yarndale Mandala.  I love how it looks despite being an oddie;  the yarn I used is a 4ply, in autumn colours that I am rather enjoying ... strange with me being a Lucy/Cath Kidston colour palette fan!

Aztec Sun Mandala

Aztec Sun Mandala in 4ply - measures 7.25" (18.5 cm) across
As an extra pop of the darker colour, I used a surface chain circle after row 4; also used a big darner threaded with double yarn to stitch into the circle at the centre and out through the dc's in row 2 to create a spiked effect. No pattern for this one, just experimenting with stitches!  

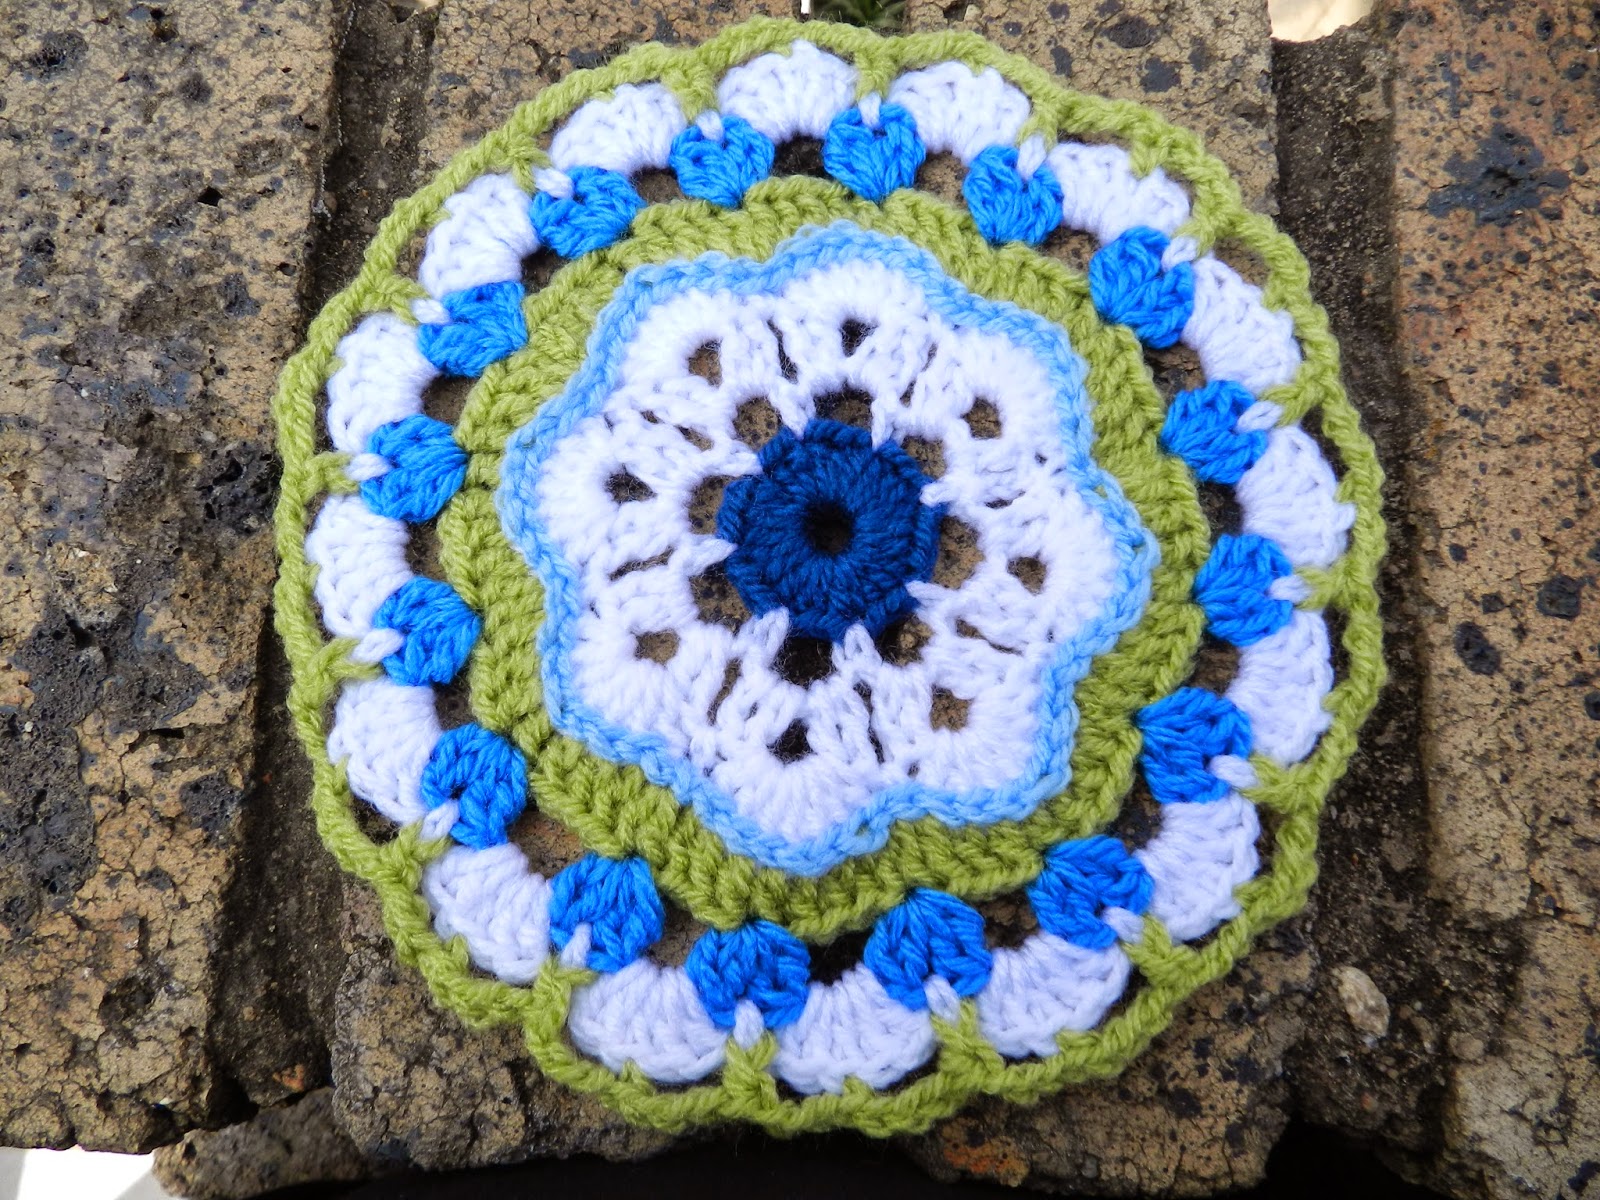
My Yarndale Mandala is finished and on it's way to Skipton UK ... and needless to say, it is not an oddie!   I have mainly followed my test pattern, but bearing in mind that the Mandala for the Yarndale display must not be bigger than 8 inches, and that I used much thicker yarn Elle Gold DK, size 4mm hook, it is quite lovely but quite different. Diameter across is 7.5cm.  This is the first colour-way I made up. This will hang in my Craft Studio, as a memento of Yarndale 2014 ... lovely.  I used a different colour combo for my Yarndale Mandala, the pattern for which is up on my blog today!


Aztec Dazzle Mandala 


May 11 was my birthday and well as Mother's Day (in South Africa);  we had a lovely lunch at my daughters home, with friends and family ... just missed my eldest son so much ... he lives in Woking UK!  A beautiful bunch of gorgeous pink roses and gymsophila stands on my dining room table, so lovely. Special time, very precious.


Until next time
xxx Pat


Friday, 9 May 2014

Yarndale 2014


This wonderful event is taking place again this year in September. I was beyond happy when asked to test these three beautiful patterns ......... 


...It was kept under wraps while the designing and testing was being done.  Then ALL was revealed !!!  They are designs chosen by Lucy of Attic 24, the creations of my dear bloggie friend and highly talented crochet artist Zelna of Zooty Owl Crafty Blog. 
Are they not gorgeous??   
Such excitement ... and I was so pleased to be a teensy weensy, very small part of the process, thank you Zelna!  All the patterns are available on her lovely blog, inspiring you to get your hook and yarn out and make a Mandala to send to Yarndale as a contribution to the display that Lucy is planning for the event this year .... sure to be AWESOME!


Read all about it ...the Yarndale blog and Attic 24 have all the info and Zelna's Yarndale post has the patterns .... do have a look!

Have a happy and creative weekend dear bloggie friends
Cheers for now
~ Pat ~

Sunshine Mandala


  ~Sunshine Mandala~

I wanted a slightly bigger Mandala so I decided to enlarge my first pattern, by adding a few more rows, and this was the happy result!  Here is the link to the pattern
which has rows 1 - 11, Row 12 follows below!


Notes:  

  • Use either chain stitches or standing dc/hdc/sc to start any row in this pattern or Maybelle Flower Pattern or any patterns that I may post in future. Sites showing how to make standing sts can be found on my previous post here
  • Descriptions of the Double 2dc cluster are also in my previous post for the Maybelle Flower Mandala.


Here are the additional rows:

Row 12:   Attach yarn in any sc stitch, with a chain 3 (or standing dc) into this stitch, make a Double 2dc cluster, ch 2,  sc into centre dc stitch of shell, ch 2, Double 2dc cluster into sc in between shells, chain 2. Proceed round circle in pattern and join to top of 3 ch (or top of standing dc) to finish the row. (16 Double 2dc clusters and 16 sc's)


Row 13:  Attach yarn in any 1ch space of a Double 2dc cluster and do 1sc, ch 4, 1 Fp sc around sc of previous row, ch 4, sc into 1ch space of cluster, ch 4.  Continue in pattern and join with a sl st into first sc to end row.


Row 14:  Attach yarn (or in the case of my example) sl st into any 4 ch space.  Ch 3 (or use standing dc), 3dc all into 4 ch space, 2 ch 4dc into next 4 ch space. Continue in pattern and close with a sl st into starting 3 ch (or top of standing dc)


Row 15: Attach yarn to top of first dc in any group of 4dc. Ch 3 (or standing dc), 1dc in next dc stitch, 2ch, 2 dc in each of next 2 dc sts, ch1.  Proceed in this way, you will see each group of 4 dcs from previous row will have 2 dc 'legs' 2ch and another 2dc 'legs' and each group separated by ch1. This is the foundation row for Row 16, which completes the Maybelle flower petals to mirror the petals in the centre flower.


Row 16:  Join yarn to any 1ch space (or keep the same colour yarn as I did) and make 1sc to start the row.  7 dc into 2 ch space, 1sc into 1ch space 7 dc into 2 ch space. Continue in pattern and finish with sl st into starting sc.


Row 17: Join yarn into any dc stitch, and sl st a border into each dc stitch around the petals, sl st into first sl st to end row.


ET VOILA!! 


I will be posting a photo 'how-to' shortly, just in case you find it easier, like I do .. to follow a pattern that way.

Exciting news has just been posted regarding Yarndale 2014 ... Lucy from Attic 24 has details on how to take part in this fab event;  also Zelna from Zooty Owl has exciting Yarndale news of her own .. be sure to take a peek at her Yarndale blog post!! 

I am excitedly setting about designing a new Mandala for my contribution; these wondrous wheels are sooo addictive, make one of the many patterns available, I bet you will have number two on your hook in no time!


Hugs 
Pat


Sunday, 4 May 2014

Maybelle Flower Mandala Pattern

First Ta-dah moment : Maybelle Flower Mandala Pattern


I am beyond excited ..... I am posting a pattern of my own creation! What a feeling .. I am nervous and anxious, but also almost jumping for joy, and most of all so proud that I have achieved this level of confidence to have fellow crochet friends actually reading and perhaps trying my pattern, thank you ♥

Pattern terms: US (find UK terms here)
Hook: 4.00mm
Yarn: Elle Family Knit Double Knit
and a nice big eyed darner and scissors

Stitches used: Sl st ~ slip stitch; sc ~ single crochet; hdc ~ half double crochet
dc ~ double crochet; Fp sc ~ front post single crochet; Fp hdc ~ front post half double crochet; Fp dc ~ front post double crochet; and Double 2dc cluster

Notes:
☻To make a Double 2 dc cluster:
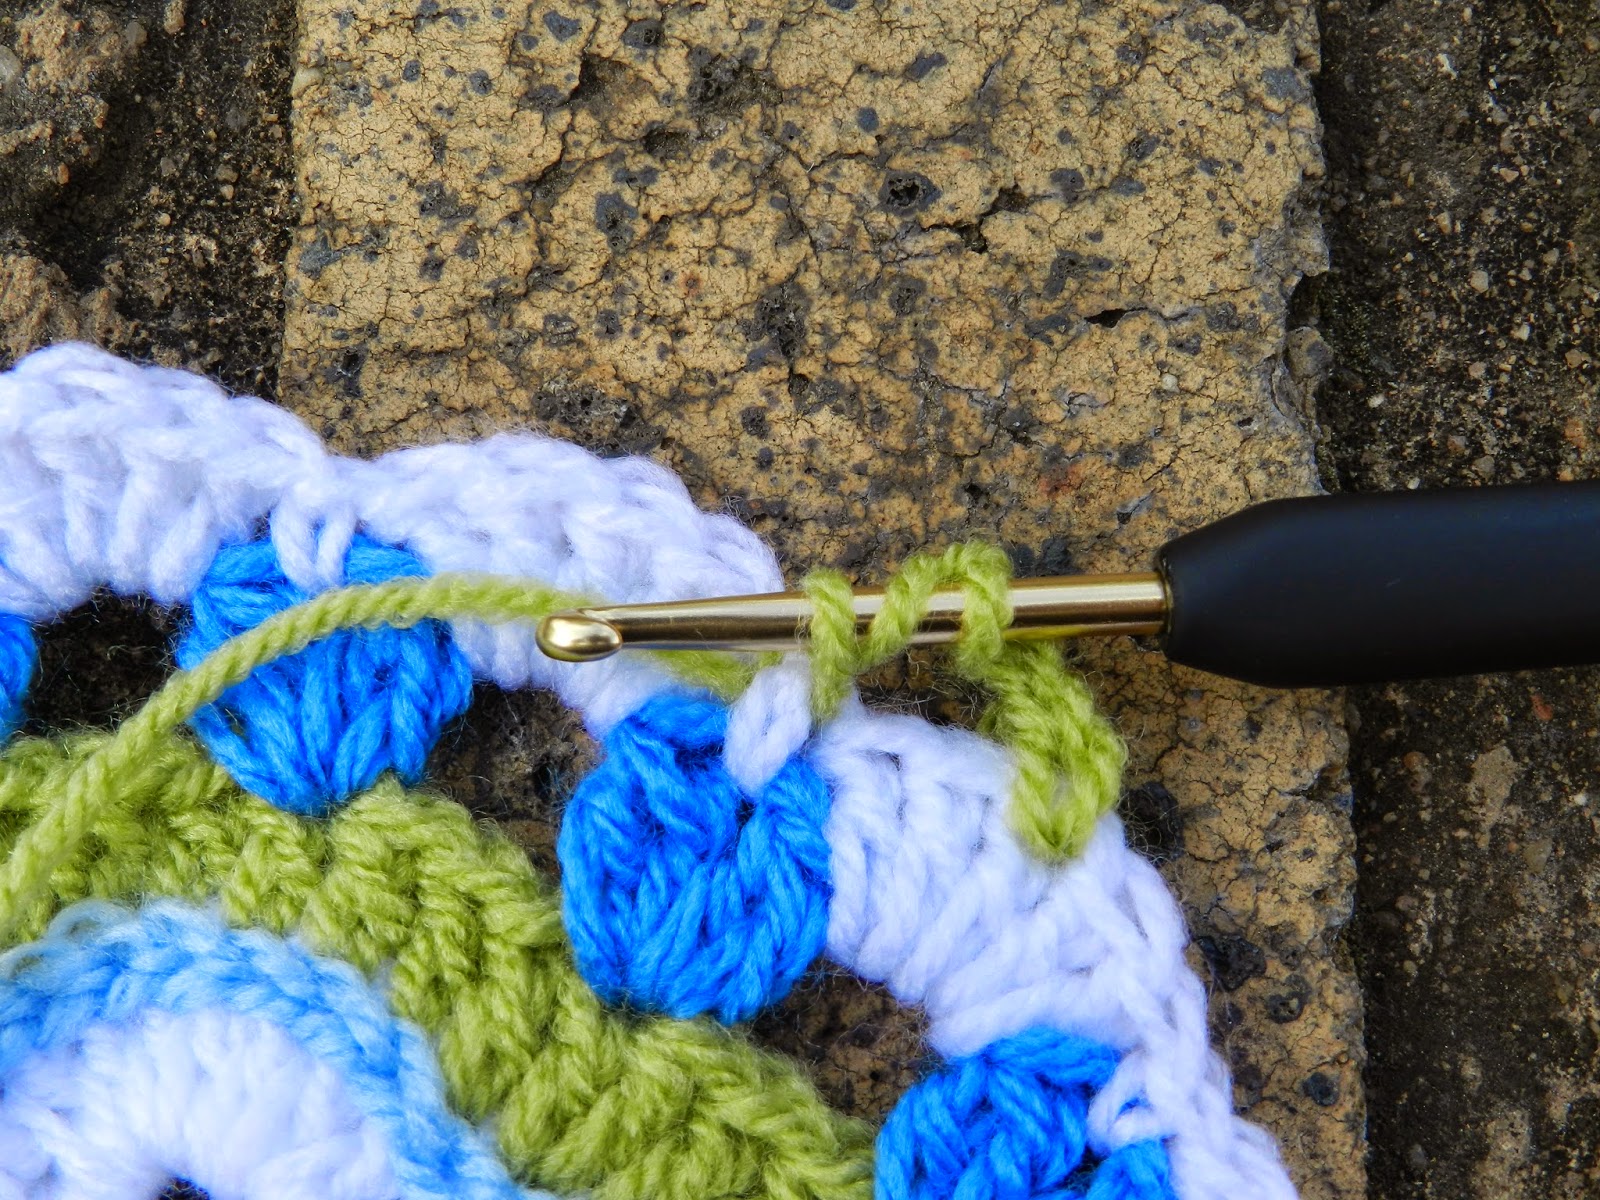
*Yarn over hook, insert hook in next stitch, yarn over hook, draw yarn through the stitch, yarn over hook, draw through 2 loops on hook, leaving 2 loops on hook. Yarn over hook, insert hook into same stitch, yarn over hook, draw yarn through stitch – 4 loops on hook, yarn over hook, draw through 2 loops on hook, yarn over hook, draw through last 3 loops** Chain 1, and repeat from * through to ** in same stitch – thus making a double 2 dc cluster in same stitch. Here is a small picture to show how it looks completed.


 Double 2 dc cluster

☻ This lovely site has really good photos showing how to close rows of rounds of any stitch. I prefer this method, it is neat. Her blog is full of great patterns too! Her colour combos are inspiring!

☻Foundation row can be made with either the method as described in the Maybelle Flower pattern or with a Magic Circle, link for Magic Circle is here

☻Standing double crochet link can be found here

☻Standing half double crochet link can be found here

☻Standing single crochet link can be found here

The Maybelle flower centre is on this site. Follow pattern, working 23hdc into circle (instead of 23dc) as in pattern. That gives us a stitch count of 24hdc including the 2ch ~ I wanted a smaller circle to start the flower.  Proceed with Rows 2 - Row 4 as per pattern. (16 petals)


The following rows form my pattern:

Row 5: Attach yarn to any dc, sl st into each dc stitch through both loops quite loosely, this just forms a sl st border to the flower and you don't want the petals to pucker; work around flower, join to first sl st to end row.

Row 5


Row 6: For this row, you will be working into the loops behind the sl sts. Attach yarn into loops of dc at centre of ‘valley’ between the petals, chain 3 (or start with a standing dc), add a second dc into same space, dc into next 7dc back loops, 2dc into back loops of next dc, dc into next 7dc, proceed around circle and join to top of 3ch or to top of standing chain to end the row.

Row 6


Double loops behind slip stitch row


Row 7: Attach yarn in between any double dc stitch, chain 3 (or start with standing dc), into this space, make a Double 2dc cluster, ch 2 * skip 3 stitches, Double 2dc cluster into 4th st, chain 2 , Double 2 dc cluster into next 'valley' ch 2** . Proceed between * and ** round circle and join to top of 3 ch (or top of standing dc) to join the row. (16 Double 2dc clusters)

Row 7


Row 8: Attach yarn to any 1 ch space, 1 ch (stands as first sc), 5 dc into following 2 ch space ~ making a 5dc shell; *1 sc into 1 chain space, 5 dc into 2ch space** Continue in pattern between * and ** to the end of row and join to 1 ch at start.   16 shells or wedges

Row 8


Row 9: Attach yarn to centre dc of shell, chain 4 (1 ch to stand as starting sc and a 3 ch loop), 1Fp hdc around post of sc (as show in picture) chain 3, 1 sc into centre dc of shell, chain 3, 1Fp hdc around post of sc, chain 3, 1 sc into centre dc of shell , continue in pattern, end by joining row to beginning 1ch.


Row 9


Row 10: Attach yarn into any 3 ch space, chain 2 ~ forms first hdc or use standing half double crochet; 2 hdc into same 3 ch space , 1 Fp hdc around Fp hdc of previous row, 3 hdc into 3 ch space, 1 Fp hdc round sc. Continue in pattern, join row with a 
sl st into top of 2 chain or standing hdc.

Row 10


Row 11: Now for the final row, find the space just before Fp hdc of previous row, as indicated in picture, and attach yarn; chain 3 or start with standing dc; add two more dc into same space; 1 Fp dc around Fp hdc, find space just after Fp hdc and work 3 dc into the space; skip 3 dc, 1 Fp sc around Fp hdc on previous round, continue in pattern. To finish sl st into top ch of 3ch or top of standing dc to join row ~ 16 shells.

Row 11


Ta Daah!

~ and there we have it! I will beg your forgiveness in advance for: a) my long winded explanations and b) any glaring mistakes ~ this being my very first attempt at putting a pattern into script! Please feel free to leave a comment if any such gremlins crop up!

Pretty in pink


I added another row to the next mandala I made, and I quite like how it looks ~


~ a row of slip stitches into the loops of the last row, in the same way as we did in Row 5!


Where I have indicated links, please explore these wonderful sites .. a goldmine of good patterns, and tutorials with clear photos ... I find photos essential when learning something new!

Watch this space for my Sunshine Mandala, based on this pattern but increased in size by another 6 rows!


Pat xx